

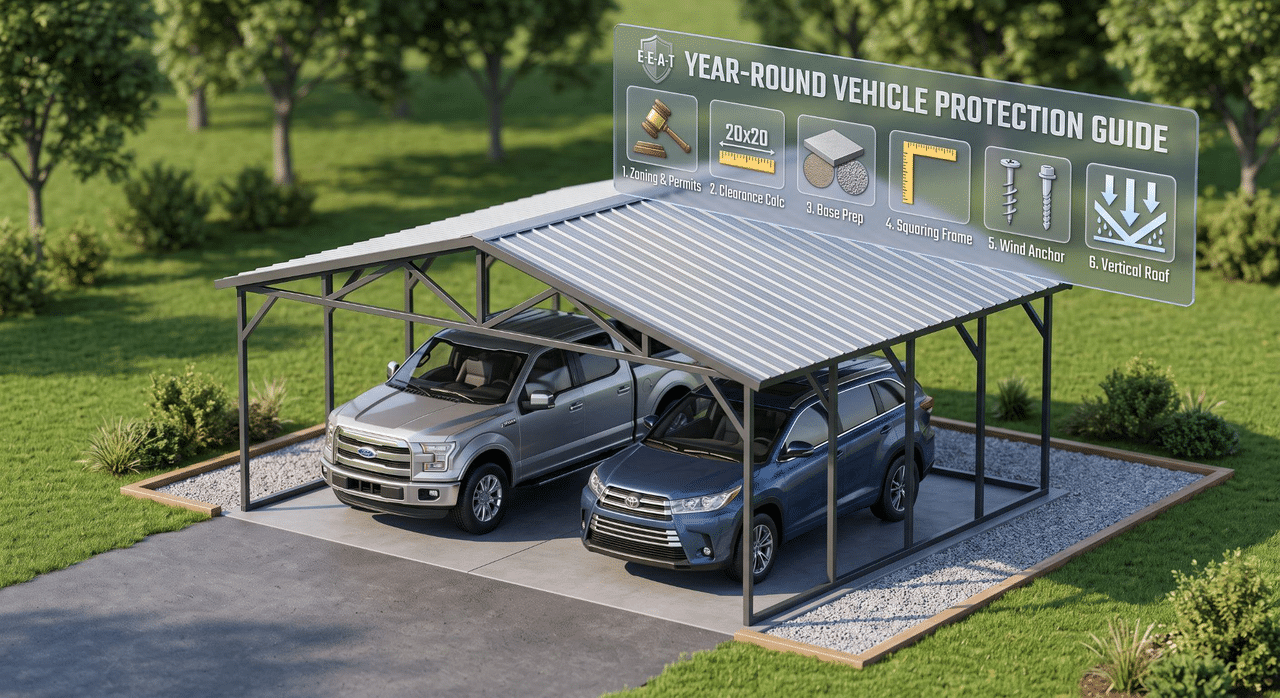
Individuals who own vehicles going through four different seasons are familiar with the rapid deterioration of their car’s finish, sealants, and electronics from exposure to the elements without any shade. Summer months of extreme UV exposure bake car interiors and cause the dashboard to crack, while the fall season’s leaves allow moisture to penetrate clear coats and cause rust formation. When it is winter, there are heavy snow loads and freezing rains, which means that drivers have to work hard removing ice every morning from their cars. Adding a garage is one way out, but this is a costly and time-consuming endeavor.Building a steel shelter may provide an answer to the problem at hand. Nevertheless, in order to ensure proper installation of the steel shelter that will be able to withstand gale force winds and heavy snow, the proper sequence should be followed.
Permits for Setting Back from Boundaries
Prior to excavation or ordering construction materials, check your municipality’s building or zoning website. It may come as a surprise, but even temporary accessory buildings have setback requirements from the property line, septic drain field areas, and any public utilities. Most building codes consider the carport based on its roof surface and height. Obtaining an accessory permit saves costly demolition orders down the road. Also, call 811 at least two full business days prior to construction.
Establish the Usable Footprint and Clearances
One mistake that many home-builders make when trying to order their shelter is to base it only on the width of their vehicles without considering door swing. Standard SUVs or pickup trucks have an overall width of 6.5-7 feet when mirrors are open. To accommodate the opening of both doors, as well as some clear space along the exterior posts, two parked vehicles need clearance.When two cars will be parked at once, light utility trucks, or boats carried by trailer, the usable standard for easy maneuverability becomes a carport 20×20 metal carport with a minimum of 7-8 feet of side-eave clearance.
Prepare the Building Site Foundation
The strength of a structure is entirely dependent on the foundation upon which it sits. Uneven surfaces will result in continual torsioning of the truss, causing failure of the fasteners as well as panel deformation.
| Surface Material | Foundation Stability | Drainage Performance | Optimal Application |
| Crushed Rock / Gravel | High | Excellent | Versatile; prevents tire ruts and eliminates splashback |
| Poured Concrete Slab | Maximum | Fair (requires slight pitch/slope) | Permanent installations, heavy equipment, and workshops |
| Compacted Bare Earth | Moderate | Poor (prone to pooling/frost heave) | Temporary or seasonal storage only |
Strip all grass, topsoil, and any loose organic material from your designated area. For gravel, dig a hole 4 to 6 inches deep, cover with landscaping fabric weed barrier, and fill with 3/4 inch crushed rock with a plate compactor.
Base Rails Assembly and Square-Up
Remove your base perimeter rails from their packing and place them over your marked-up site. Loosely link the ground rails together, and then measure corner-to-corner for diagonals X and Y using a 50-foot tape measure:
If Diagonal A–D equals Diagonal B–C, you have a perfect square setup (right angle corners). If not, readjust your rail lengths to make the two distances equal.
Install Vertical Leg Posts and Roof Trusses
Assemble your roof trusses at ground level where you have solid footing and mechanical advantage. Today’s modular kit products, such as an engineering marvel called an erommy carport, include the addition of triangular apex braces to bolster the center ridge.Once your trusses are together, enlist two assistants to lift the vertical leg posts to the solid base rails. Attach the roof bows to the vertical posts with galvanized fasteners, tight enough to move just a little until all vertical posts are vertical with a magnetic torpedo level.
Anchoring the Frame for Wind and Uplift
Open carports having no exterior walls will generate aerodynamic uplifting forces because of the air passing under the structure. It will rip off an unanchored frame from the ground.
- Concrete: Drill holes for anchors by means of hammer drill and install 1/2-inch wedge expansion anchors at least 4 inches deep into the concrete.
- Soil or Crushed Rock: Don’t use smooth and straight spikes of rebar. Use 30-inch heavy-duty helical earth augers screwed into the subsoil near each foot of the post.
Attach Roof Panels and Edge Protectors
Install the galvanized steel roof panels commencing from the windward side of the structure, making sure the overlaps between the panels are made in accordance with manufacturer’s specifications. Always install self-threading screws with weatherproofing UV-resistant neoprene or EPDM rubber washers. Fasten the screws tightly, but not too tightly since it will flatten out the rubber washer, and create water entry points. Make sure you install the ridge caps and edge protectors to cover exposed steel edges and divert runoff from vehicle parking areas.

This content is brought to you by the FingerLakes1.com Team. Support our mission by visiting www.patreon.com/fl1 or learn how you send us your local content here.